


Projects
Optimizing Spaces in Hospitality Structures 🛎️ with Flush Doors
In this B&B our flush doors have helped optimize these spaces, creating invisible solutions that hide technical areas and improve
Step by step instructions to install a invisible panel in a masonry wall.
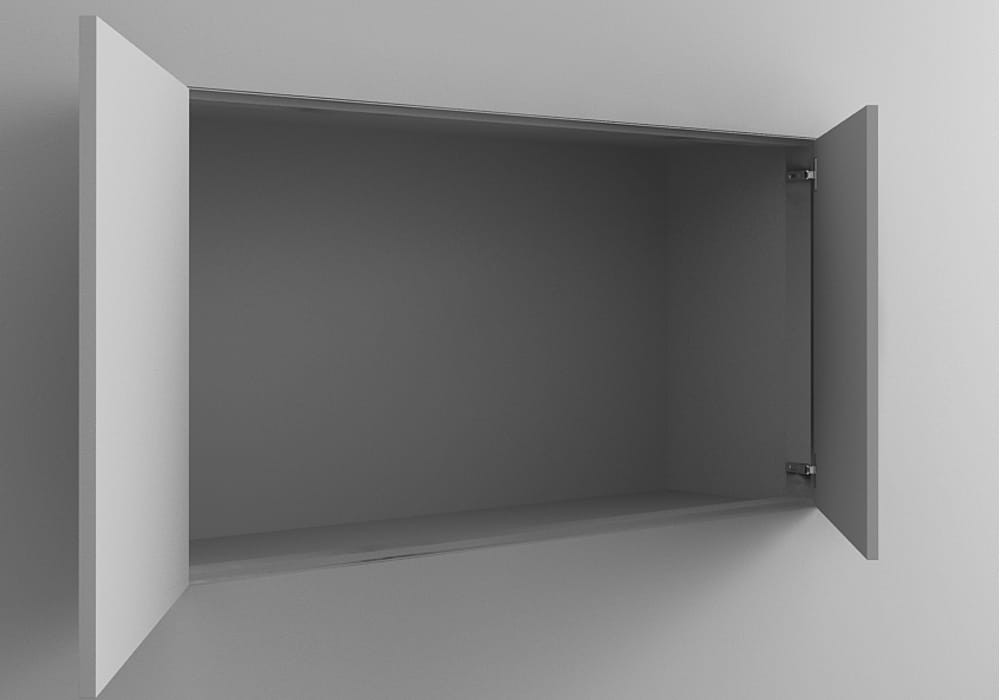
Do you want to conceal recesses, wiring or meters with a invisible panel? Excellent idea. The special technology of invisible panels makes for total invisibility. Thanks to the absence of protruding elements and adjustable hidden hinges, a closed invisible panel is perfectly aligned with the housing wall. Furthermore, to open and close it a soft push of your hand will be sufficient – no need for handles. But ? Here is how to install a invisible panel in a masonry wall.
Invisible solutions can differ depending on the maker. InvisibleDoor panels are easy to install in plasterboard or masonry walls. The panel, 19 mm in width, is in fact pre-installed in the frame, and the hinges fitted on the panels are adjustable. This makes it possible to adjust height, length and depth to compensate for any defects in the wall so that the panel will be perfectly aligned. Invisible panels can be ordered without handles, with push/pull systems, or with knobs. Here is how to install them in three simple steps.
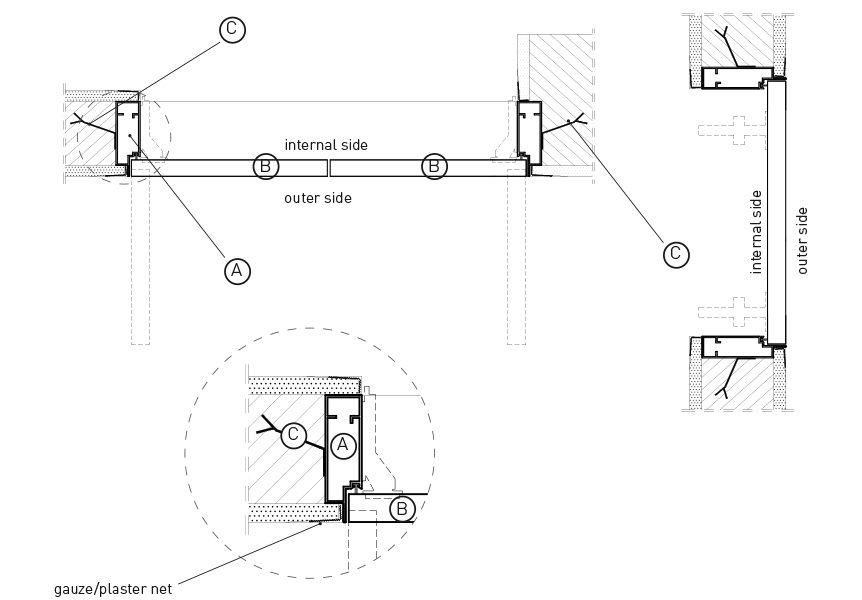
1. Take the panel (A) mounted in the frame (B) and insert it in the opening in the brickwork. During this operation, you must pay attention that it is level and plumb in all directions.
2. Fasten the frame by walling in the cramp irons already arranged on the frame (C) .
3. Apply mesh on the surfaces where the plaster meets the aluminum frame and spackel carefully.
Thus installation will be practical and efficient.
In this B&B our flush doors have helped optimize these spaces, creating invisible solutions that hide technical areas and improve
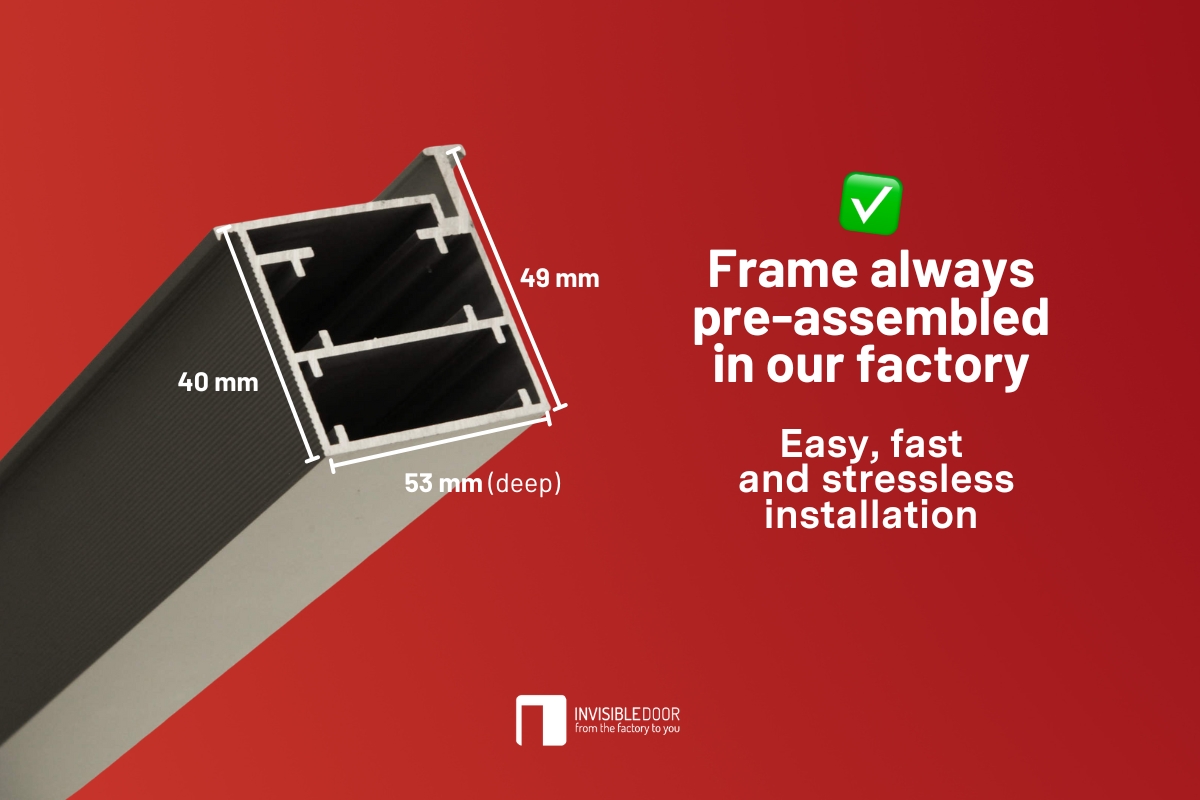
Resistance is a distinguishing feature of InvisibleDoor doors. Thanks to the 53mm panel, all models guarantee durability and stability in

You can install an InvisibleDoor door yourself. In fact, the quality of the door itself and the fact that it
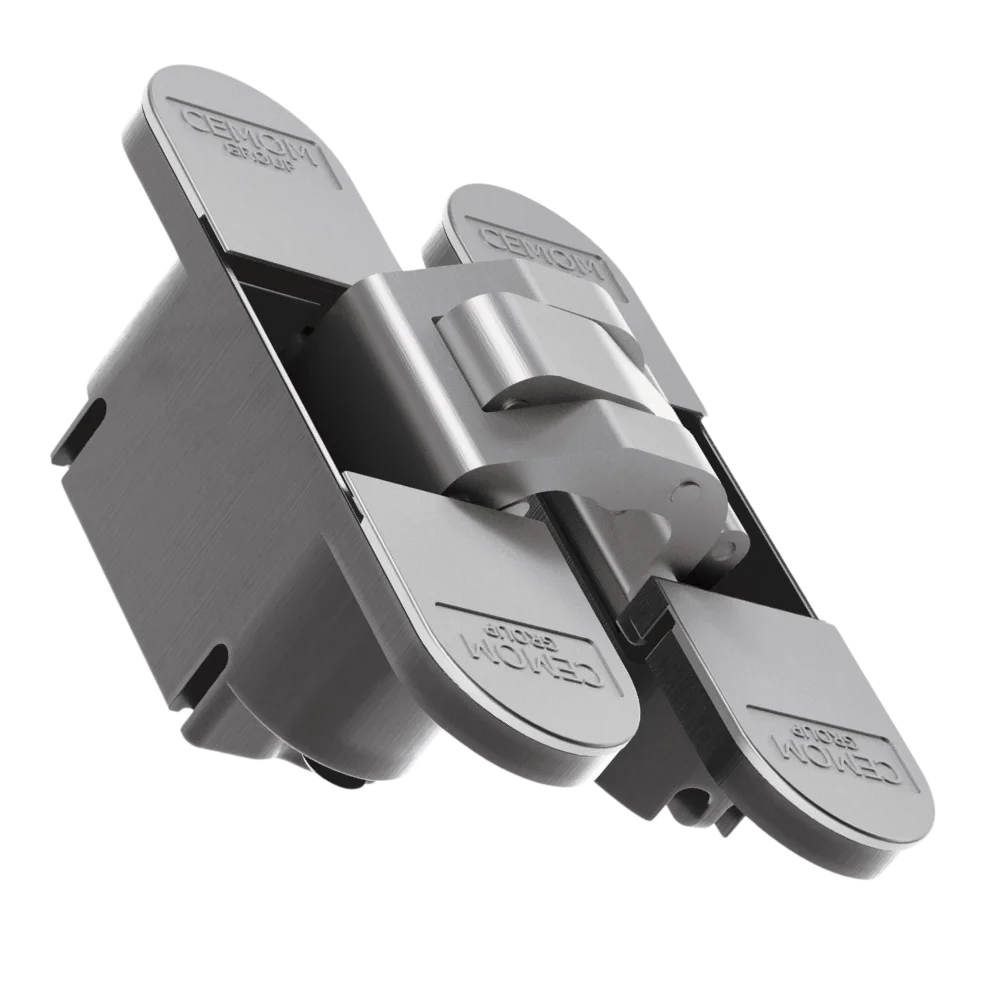
Choosing the right hinges is of the utmost importance when installing a door. As the style and functionality of a
Centro Diffusione Serramenti srl
Via Roma 234 – 59100 Prato
COD.FISC. 03728290481
P.IVA : 00320530975
